
Table of Contents
Introduction
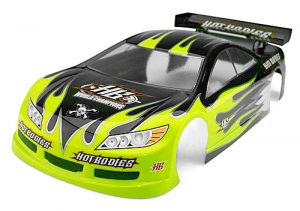
Owning a radio-controlled car can be unique. The cars are known for high speed and are wildly impressive, and depending on the size and types; it always comes in various paint colors. Paint colors are quite crucial for RC cars; it is one of the attention-grabbers to spectators. It might be that the RC car is old and worn out, scuffed or scratched, or just due for a new paint makeover; whatever the reason might be, painting RC car bodies is an exciting and interesting activity, as owners take delight and enjoy spending hours defining their RC vehicles with paint colors of their choice.
Depending on the material that the RC car is made of, you will have to use the right paint for the purpose because most times, the paints do not stick on the RC body it is being applied to. RC car bodies are typically made of a transparent and durable plastic known by Polycarbonate’s family name. Still, they are referred to mostly by the brand name “Lexan”-a type of Polycarbonate plastic. Another RC car body source is the Styrene or ABS hard body (all still part of the plastic description).
What are the Types of Paints and Techniques used for Painting RC Car Bodies?
Knowing the type of paint to be purchased that will suit the RC car is very important before painting. Polycarbonate paints designed for RC cars are the most recommended types of paints to use on an RC car body. Although you can do with standard wall paint and spray paint, these do not adhere well and last longer compared to paints designed explicitly for polycarbonate RC bodies. If you are painting a Styrene or ABS type of body, using regular spray paint, preferably an enamel spray paint is recommended.
Acrylic paints give room for layering when painting; it is quicker to dry in between coats and do not give off harmful substances into the air. Enamel paints, on the other hand, take more time to dry. They give a smoother and full finish but emit toxic substances into the air; there are diverse ways you could go about to paint your RC car bodies, and most times than not, owners apply more than one style in doing this. Lacquer paints also offer as an alternative or consideration while planning to paint an RC car.
Depending on the parts of the car, the methods employed in painting varies. It could be the Air Brush method, the Spray-Painting method, Brush-applied Painting, or a fusion of one or more of the three methods. Spray painting allows for a uniform and seamless finish. When using the Spray-painting method, ensure that the body is well-prepped for application, i.e., well cleaned and ridden away of dust and dirt. The brush-applied method involves using a brush to apply paint to the car body and parts. However, there is a tendency to lose accuracy or precision in painting as it is often difficult to control. It is mostly used for entire body painting; smaller brushes are advised for more detailed work to increase precision. If you want to achieve a much higher degree of precision, control, and flexibility during painting, using an airbrush is your go-to method while painting your RC car body.
What should you do before painting an RC car?
After choosing the right and suitable paint that is to be used for the painting of the RC car body. It is necessary to go through the following before the actual painting takes place:
- Using sandpaper or a Scotch-Brite Pad, scrape the plastic’s surface to enable the more free application of paint. Applying paint directly is not bad, but it won’t give the surface room for easy coating and adhesion. Ensure that all scuffing stops when the surface has begun to look the same and somewhat dull in appearance. Wash the body to get rid of any dust or contaminant that might inhibit the painting process. Rinse and allow to dry completely. This is a critical step.
- Shake the paint container thoroughly, fill a container with hot water from a tap source, note that it should not be boiling. Place the paint can to sit in the water for about 10 mins. If it cools fast, keeps replacing the hot water until the paint can is heated up. This act of warming can increase the pressure in the can, thereby offering an improved and superb finish and increasing the rate at which the paint will dry.
- Using a suitable vinyl or frisket masking tape, High-quality FrogTape and 3M/ScotchBlue are highly recommended, and making sure that the tape is dirt-free, tape the areas of the RC body. After masking, ensure that you cut away any excess tape that will show forth using a blade. Good masking tapes are more comfortable to remove as they have crisp edges for clear lines during painting.
- Run your fingers or flat card over the entire masked areas before spraying. This is to ensure that all the edges are not loose or lifted due to tension or the curvatures of the vehicle.
- Applying two light coats or layers of paint before entirely painting will help ensure that all the edges of the masked area as mentioned above are well sealed, and if not, will be minimized before actual painting can begin.
How to Paint an RC Car Body?
Remove the masking tape off the surface carefully. Following your choice design, mask off the areas that will receive the lighter shade of color. Always start painting with the dark colors first so that it won’t exsanguinate through the lighter color.
To avoid wastage of paint and to gather broad coverage area, do not hold the nozzle downwards while spray painting. Hold the nozzle about 10 inches away from the body in even strokes. For areas where the spray paint doesn’t get to reach easily, use a paintbrush to apply in those areas.
The paint drying time is between 15-20 minutes. However, a completely dry time suitable for the car to be used takes about 24- 48 hours. Ensure the car is completely dry before using it. When it is, take off the masking tape used to cover the car during the painting activity.
Conclusion
When you are done spraying, be sure to clean the nozzles of the spray container. It is also an adequate consideration to keep the masking tape used in a plastic bag to protect it from any contaminants that will affect future painting with the items. Try to paint the RC car body in a location that doesn’t have wind and dust blown across so it won’t ruin your painting job.